
What is Open Dental
“Open Dental” is a dental practice management software. It enables Providers and staff to schedule appointments and send reminders to patients automatically through text messages and email.Open Dental is compatible with Windows, Linux and Mac operating systems.Current versions of the software require Microsoft Windows.
Download and Install open dental trial version
Download “Open Dental” software @ https://www.opendental.com/trial.html and install it on the system. Launch the application and register as a new user by entering mandatory information. Now, login to the application by using registered credentials. “Home” screen will be displayed as shown below:

Create new patient
To create a new patient, click on “Select Patient” button on the main toolbar. “Select Patient” window will be displayed as shown below :
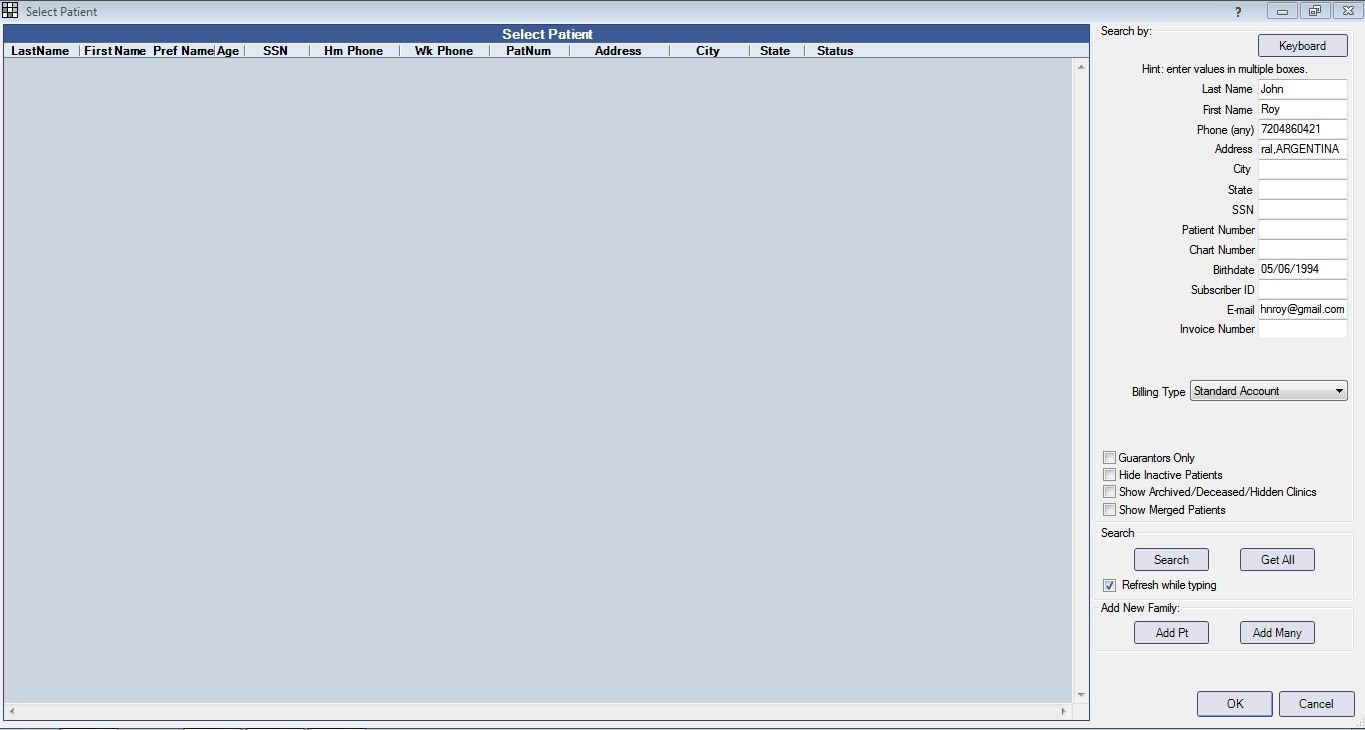
Now, enter either “Last name” or “First name” to ensure that patient doesn’t exist. System will perform auto-search with the entered text and display the search results. Once search is complete and patient doesn’t exist, click on “Add Pt” button (under ‘Add New Family’ section) to add single patient. “Edit Patient Information” screen will be displayed as shown below with the entered text :
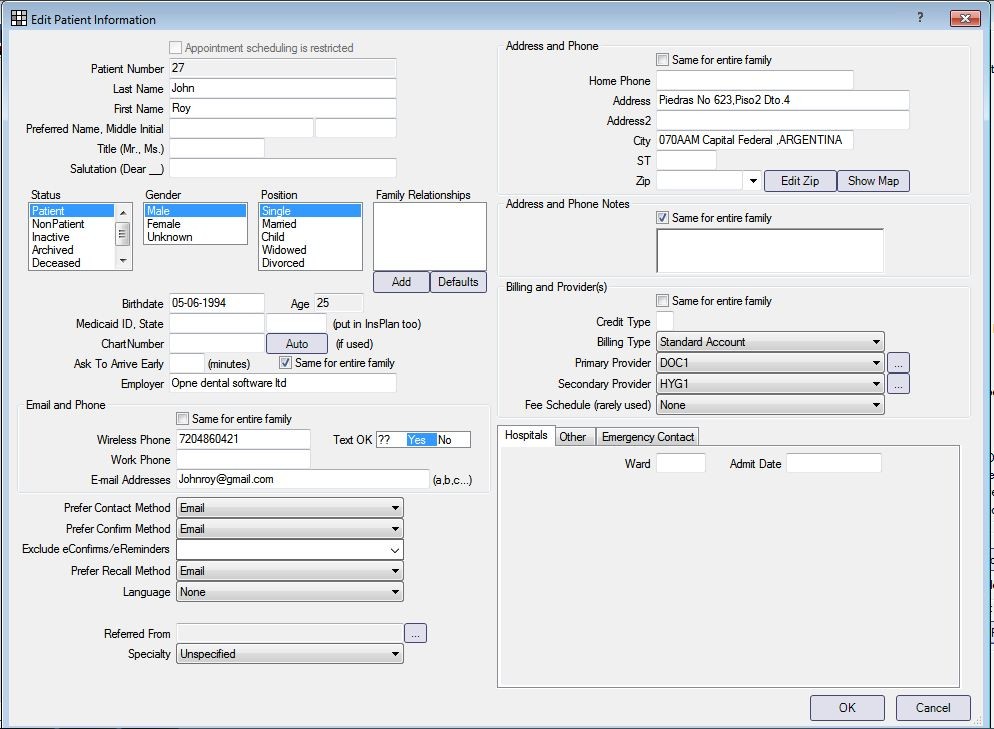
Enter relevant information and save the patient record by clicking on “OK” button.
To add multiple patients of a family, click on “Add Many” button (under ‘Add New Family’ section) in “Select Patient” screen. “Add Family” screen will be displayed as shown below:

Create new appointment
To create or view appointments, click on “Appts” module in the left side bar. To add an appointment, select a patient by clicking on “Select Patient” button in the main toolbar. Search for a patient and select the record. Appointment view will be displayed as shown in the below screenshot :
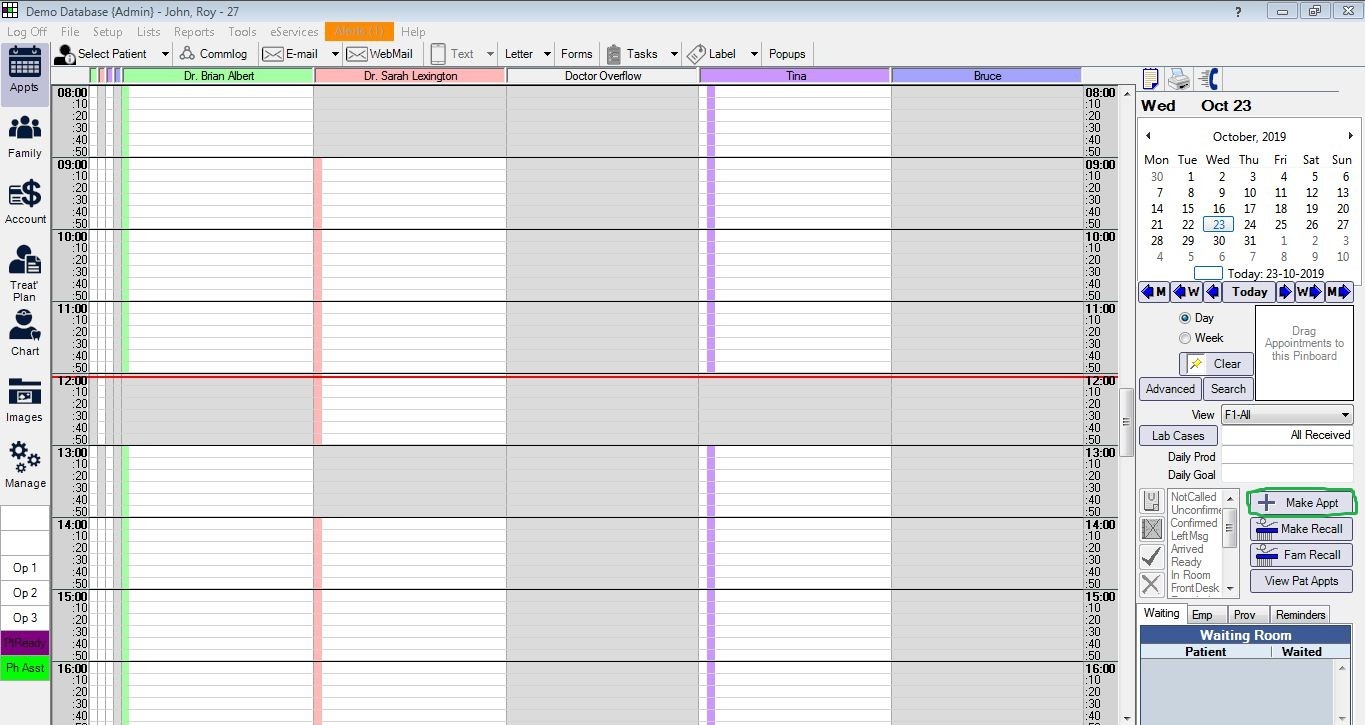
Click on the “Make Appt” button displayed on the right side. “Edit Appointment” window will be displayed as shown in the below screenshot:

Add procedure(s) and other information and click on “OK” button. Appointment will be created and displayed as shown in the below screenshot :
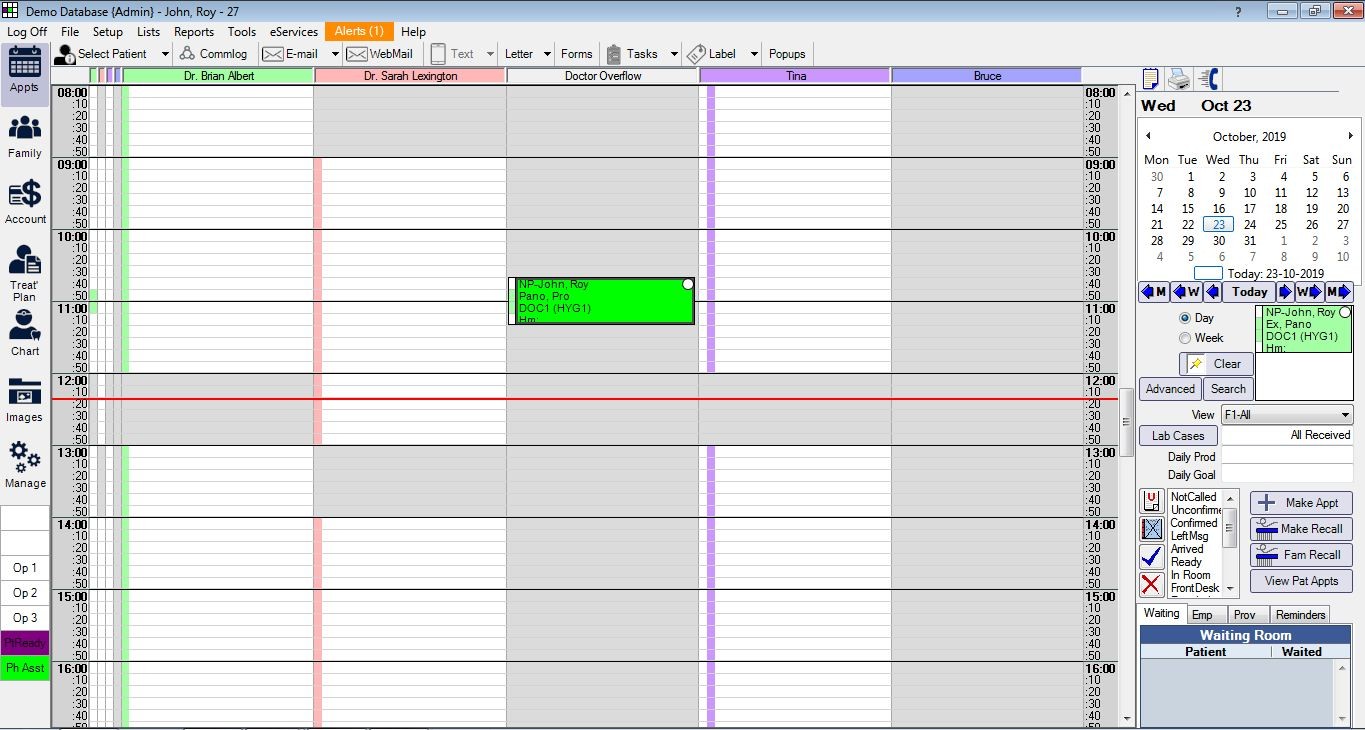
View of appointments in a day is shown as below:

Cancel the appointment
To cancel an appointment, right click the appointment and select “Break appointment”. “Break appointment” dialog will be displayed as shown below:
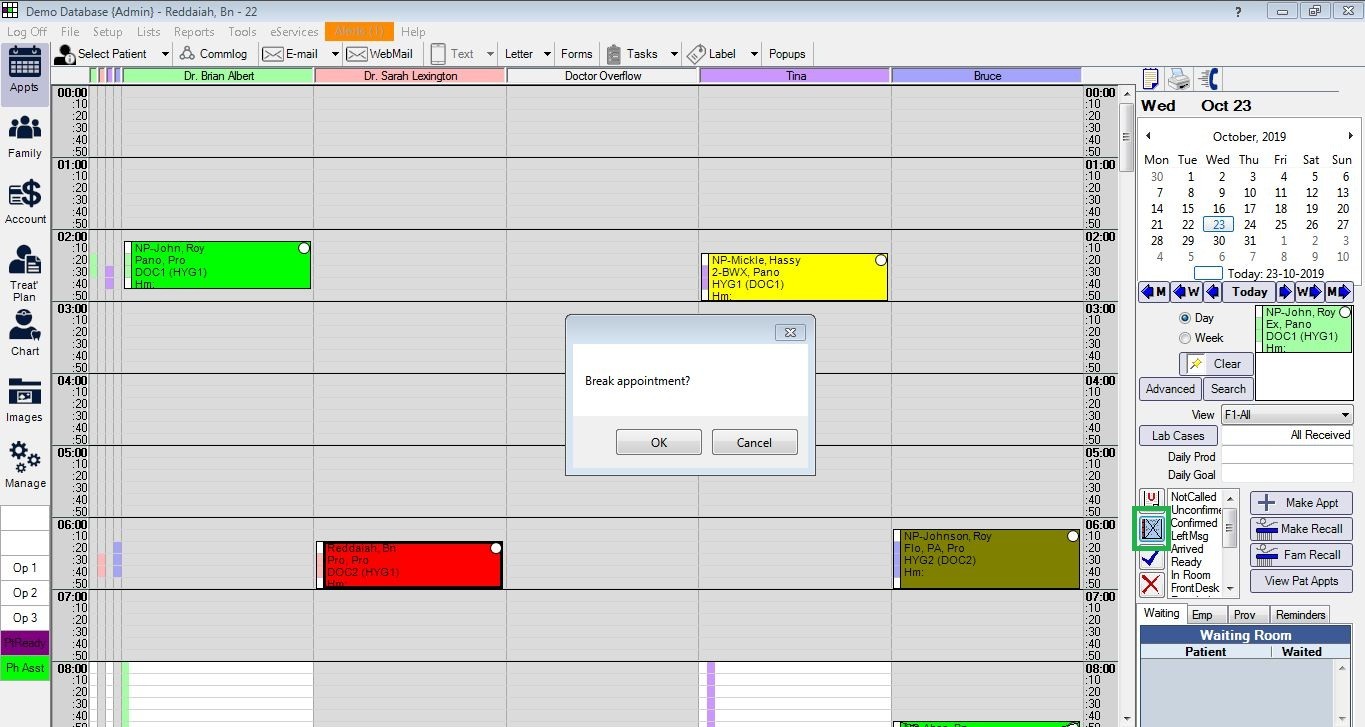
Click “OK” to cancel the appointment. Cancelled appointment will be displayed as shown below (highlighted using green color):

FHIR api access
Access FHIR by navigating to ‘Set up’ menu – > Advanced setup -> FHIR, pop up dialog will be displayed as shown in the below.

Generate developer key:
From the FHIR Setup(shown in the above) pop up dialog click on “Generate key” and fill the required details.Finally new generated API Key will be displayed as shown above. It is authorized for read operations only.
Eservices
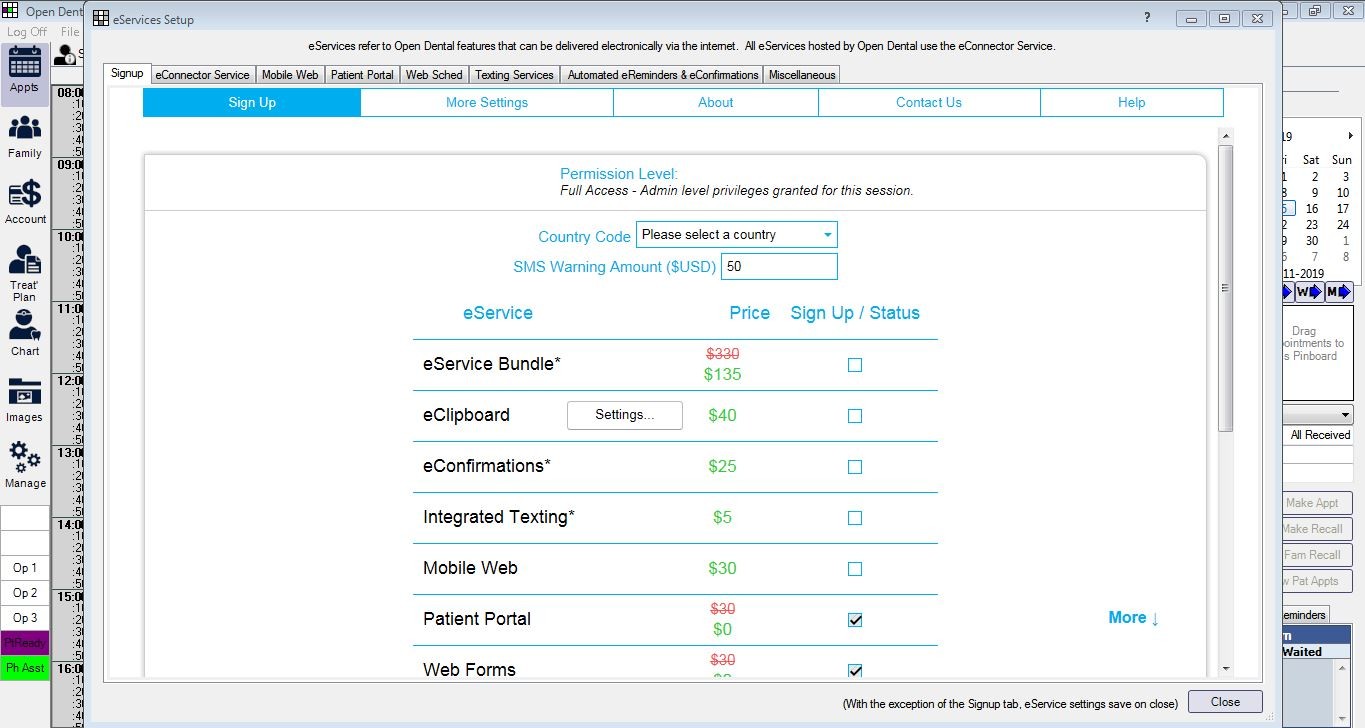
Navigating to ‘eservices’ menu – > Sign up, pop up dialog will be displayed as shown in the below.
Database access – MYSQL
MYSQL database access from DBeaver
Before logging in to the DBeaver tool, select database(Eg:MYSQL) and provide login credentials. Now, user can login to DBeaver window as shown in the below screenshot :
Retrieving patient(s) information (Manual method)
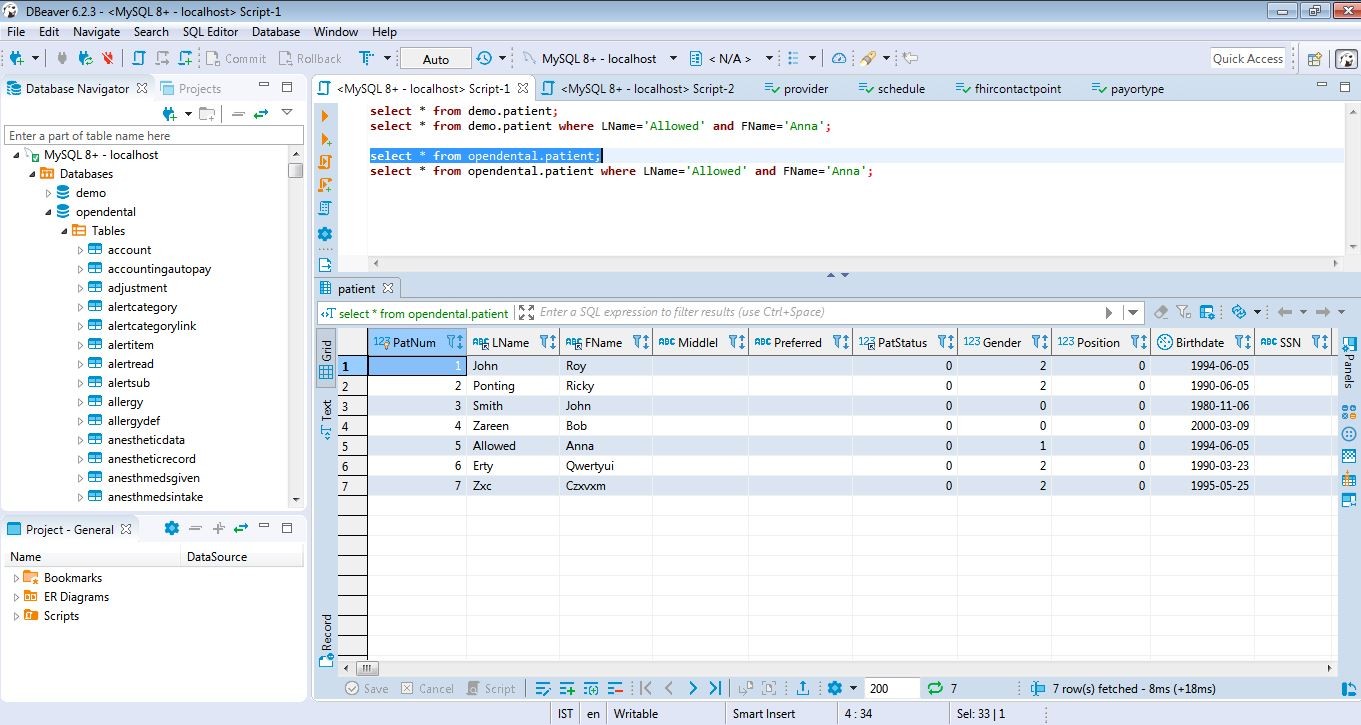
Expand the MYSQL 8+ -localhost from the Database Navigator (left side). Now, expand Databases, extend opendental and finally extend Tables and double click on patient table. The patient table will be displayed as shown below:

Retrieving all patients information (by using SQL query)
Click on SQL Editor from main menu and select SQL Editor. Enter SQL query. Ex: select * from opendental.patient;
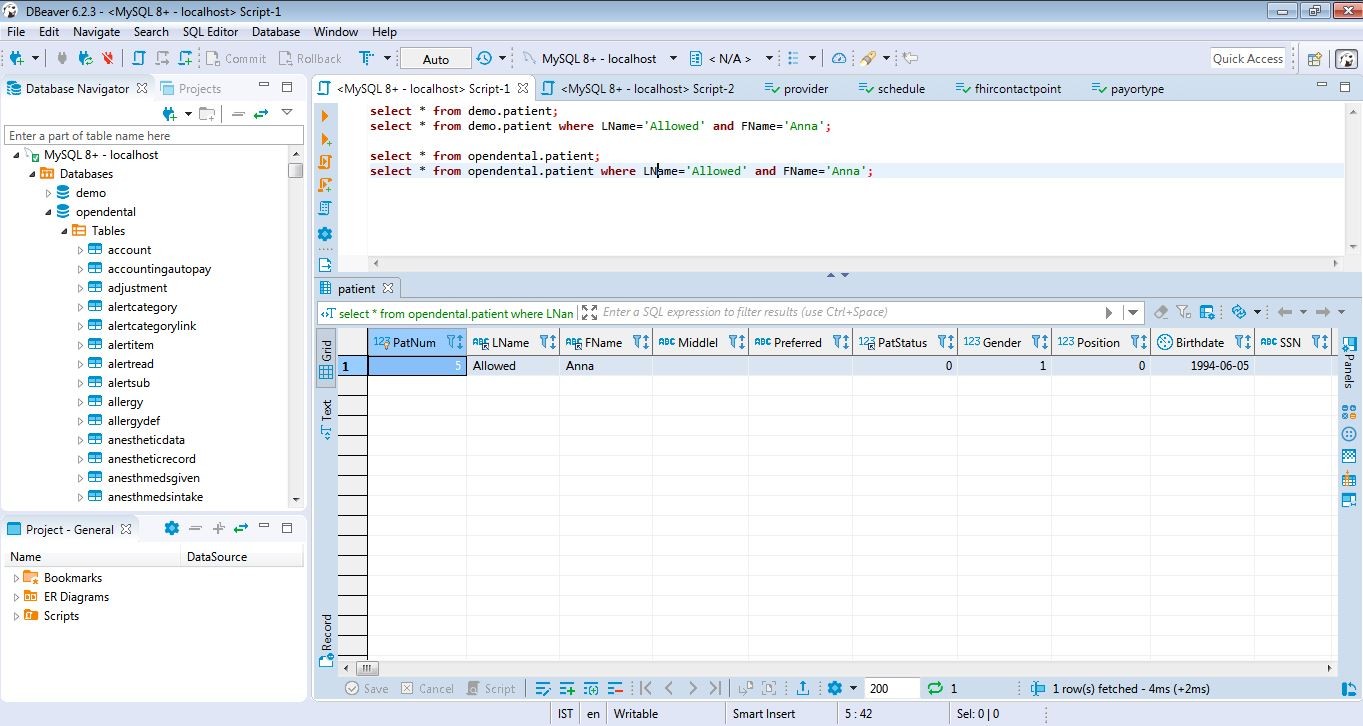
Retrieving specific patient information by using SQL query
Eg:SQL Query: select * from opendental.patient where LName=’PPO’ and FName=’Patty’;
Testing FHIR API in postman
1.Getting all the patient information by using FHIR API (GET Request)
Testing Environment: Open Dental hosts a test database for developers to play with FHIR. The base URL is the same for all customers and is https://api.opendental.com/fhir. The Capability Statement on this server gives a detailed, technical description of Open Dental’s FHIR capabilities. These three headers must be included in requests sent to this server:
Content-Type: application/json
Authorization: FHIRAPIKey=paste your API key
Accept: application/json
A browser extension or other software is necessary to send request headers.
URL: https://api.opendental.com/fhir/patient
After “get” request for above URL we can get all the patients information as shown below image.

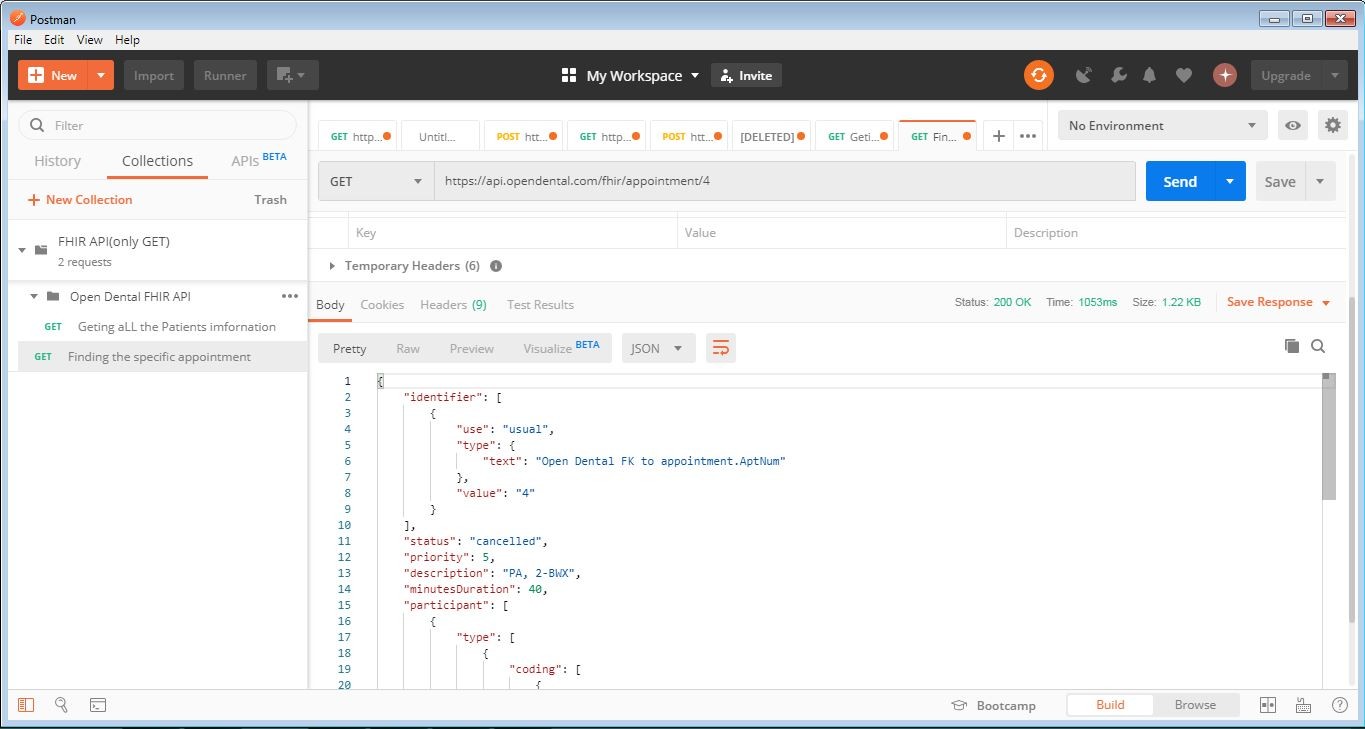
2.Finding the specific appointment through a GET request
The appointment we want is at ID 4. .After “get” request for URL below we can get appointment information as shown below image.
URL: https://api.opendental.com/fhir/appointment/4
Conclusion
As shown above we can create new patient,appointment,edit appointment and cancel the appointments using OpenDental software. Also, we can work with FHIR api and Database.